Preparing Your Soil
I am sad to announce that there are only a couple lessons left (sob), but today we are going to talk about how to prepare our soil. Hooray!
Did you know that there is a substance in existence right now that can radically improve our soil quality? It even removes much of the pollution from our water systems. It's called EM: "effective micro-organisms". They are a completely natural way of using nature's little helpers to clean our earth and water. (See an astonishing documentary on how they used EM to clean an entire inland sea in Japan here !) My family and I even drink it as a pro-biotic. More about EM to come.
The health of a plant is directly related to the health of the soil it grows in. Unfortunately, the state of our soils is so bad that more chemical fertilizer, more pesticides and more food processing is required every year to keep our food resembling food. As Thomas Linders says,"people talk about this global crisis and that global crisis. What about the soil crisis???"
For those new to organic gardening, preparing your soil can be complicated and time consuming. If you want a "quick fix" just go out and buy good soil. It's cheap and your results will be great, especially if you are planning to grow in a pot. I know this because that's precisely what I did. So, I won't be offended if you don't pay much attention in today's lesson. However, for those that are serious about the critical science of soil preparation, then let me welcome Elsie Roulston!
Elsie, what’s so special about soil? It’s just there to anchor the plants, right?Well, yes and no. If you’re farming with chemicals then yes, the soil is merely a medium in which to grow the plants, you might as well be growing them in polystyrene pellets. All the extra chemicals and fertilizers you spray onto your crops will feed them and keep them healthy. If, on the other hand, you want organically grown plants then it’s a big NO! The success or failure of your crop will depend on the quality of your soil. If we want strong, healthy plants which are resistant to pests and diseases all we need do is look to nature. Since the dawn of time soil has provided plants with all the nutrients and minerals they could possibly want, there was no need for vast amounts of fertilizers and chemicals to keep the plants healthy. If that’s the case, why am I writing this article? Surely, if you plant a few seeds in your garden you’ll be rewarded with a bountiful harvest. Unfortunately this is not the case, many years of meticulous maintenance and careless building practices has robbed our garden soils of nutrients and poisoned them with cement and other toxins.
Ok, enough gloom and doom, how do we get the perfect soil? ...and what is the perfect soil anyway?Quite simply, we undo the harm we have done by replacing the organic matter we have removed. Our goal should be to promote and support a healthy soil. A healthy soil is alive! It is a home for living organisms (soil fungi, algae, bacteria, insects, worms and burrowing animals) who convert organic matter into a more usable form for plants. Make a home for these organisms and you’ll be rewarded with the perfect soil. The perfect soil has a rich, earthy smell, is dark brown in colour, rich in organic matter, a crumbly texture and is full of earthworms, which are far more useful in your soil than bait at the end of a fishing line.
What must I do to improve my soil?Step 1: Get to know your soil There are many types of soil all with their own pros and cons but the backyard farmer doesn’t need to worry about the technicalities too much. For most of the problems there’s one solution – COMPOST. Adding compost to a clay soil will improve its drainage whilst adding it to a sandy soil will improve its water holding capacity. It’s not an instant fix, but diligently adding organic matter to the soil every now and again will give the existing organisms in the soil a chance to do their part in raising your soil’s fertility. If you’re really impatient and want it corrected instantly, I suggest you take a soil sample to a soil lab (contact your local Department of Agriculture) and ask that they suggest organic fertilizers to improve your soil’s fertility. They will then recommend the exact amounts and types of fertilizers you would need. You should also invest in a soil PH testing kit (available at most nurseries). Why? The PH of a soil determines the availability of nutrients in the soil. Most vegetables require a PH of 6.5 but again, don’t stress too much about it. By constantly adding organic matter (neutral PH of 7) to your soil you will be able to raise the PH of your soil slowly to the ideal range. If your soil is far below or above this range then you should take a sample to a soil lab for testing. Blindly adding lime to your soil to correct the PH, could be disastrous, too much ‘locks up’ nutrients and scorches roots. Never add lime to manure as nitrogen (promotes healthy foliage) is then released from the soil. Only apply lime several weeks before planting. Step 2: Support nature The goal of organic gardening is to mimic nature. If we get this right we will be able to sit back and enjoy a well deserved sundowner on the patio whilst our garden tends to itself. For a successful vegetable garden we should avoid the following:
Badly drained, waterlogged soils - Our plants need to breath! If you have a high water table or very poor drainage then the best solution is to build raised planting beds.
Bare soil - It’s a waste of resources.
Digging
- Digging damages the soil’s structure, even more so when digging wet soil.
- Limit digging to the initial preparation and then once every 5-10 years.
- Rather use a hoe for removing weeds.
Over application of fertilizers - Use organic fertilizers only when it is necessary, the organic matter which you add should have more than enough nutrients and minerals.
Walking over beds - Ever seen a footpath cutting across the lawn? It compacts the soil which you have worked so hard at aerating. Use pathways between planting beds. The beds should not be wider than an arm’s length (60cm), so that they are easy to maintain.
Introducing unwanted weeds and chemicals into our garden – if you are going to buy soil, well rotted compost and well rotted manure for your garden, get it from a reputable company. Don’t be tempted to buy cheap products from just anyone. Rather spend a little extra and not have to worry about spending the next few months getting rid of a new crop of weeds.
Apply the following practices to improve the condition of your soil:
Crop Rotation
- Maintains mineral balance of soil
- Reduces build up of diseases
- Best use of organic matter i.e. allows soil to replenish itself, less input from you
Use mulches (grass cuttings, herbs cuttings, straw, nut shells, compost, old carpets, etc)
- Suppresses weeds by excluding light
- Conserves water
- Helps maintain a stable soil temperature which promotes growth
- Adds fertility to the soil
- Improves soil texture
- Protects the soil from erosion
[Mulch is a protective layer of organic matter that is placed on the top of the soil.]
Encourage existing micro-organisms and earthworms
- Micro-organisms and earthworms breakdown organic matter releasing nutrients
- Earthworms loosen and aerate the soil, vermi-compost/ worm castings promote root growth whilst vermi-liquid/ worm wee is full of nutrients
- Dig as little as possible. Digging breaks up the soil’s natural layers and air pockets (network of earthworm tunnels and decaying roots) which assist drainage.
- Keep the soil moist and apply mulches (feeds the earthworms)
- If you feel your soil could do with a boost, then use EM (Effective micro-organisms)
EM has many applications and can be used as a compost activator as well as a soil conditioner. It restores balance by reducing harmful bacteria and encouraging the growth of beneficial bacteria.
Feed your soil!
- Use well rotted manure, compost (preferably from your own compost heap) and don’t forget mulching.
- Use organic fertilizers such as dried blood, fish and bone meal, seaweed liquid and meal, rock potash, wood ash, liquid animal manures, worm castings and ‘worm wee’.
- Grow green manure crops. It is a quick growing annual plant which is grown as a temporary groundcover and then dug into the top 15-20cm of soil as a fertilizer. Planted in an area of the garden which is not being used, they convert otherwise wasted sunlight and resources into useful organic matter. Sow as soon as soil is bare and until the first frost, cut down before flowering or going to seed and cover with a thick mulch or dig into top layer of soil. Plant annuals rather than perennials as they are easier to control. e.g. mustard, alfalfa, fenugreek, legumes (leave roots in the soil), borage and comfrey (acts as a compost activator). They remove scarce minerals from the soil and make them more available to your crops and helps to prevent erosion and leaching of nutrients.
Right, now that we’ve got a good idea of how to maintain a healthy soil, let’s get that veggie garden started!
Step 1: Don’t forget to plan
Check for Services. Make certain that you aren’t going to dig up sewerage pipes, electrical cables, irrigation pipes or the long forgotten septic tank.
Find that perfect spot for your garden. It should be close enough to the house to quickly nip out to pick a fresh tomato or see if your seeds have come up, be close to a water source and have about 6 hours of sunlight.
Decide on the size and style of the vegetable garden. Start small and in no time you’ll have more than enough vegetables for yourself and to show off to your friends. A plot the size of an average door (2m x 2m) is perfect for a family of four. Do you want a traditional kitchen garden, a pottage, a mixed border in your garden, a water-wise eco-circle (1m diameter) or an economical Peace Garden (1x2m)?
Step 2: To dig or not to dig? The digging or trenching method This method is useful if you have rocky soil, a shallow layer of topsoil or if you want to start planting right away. It is an instant way to increase the depth of your topsoil. It breaks up the subsoil and adds organic matter thereby increasing the depth of the root zone. Roots are encouraged to grow downwards (draw nutrients at a greater depth) and one can plant closer together (bio-intensive gardening). This is the method used for Eco-circles and Peace Gardens.
Mark out the area (1m x 60cm).
Remove all plant material (a good time to start a compost heap), stone and debris.
Remove the top 30cm of topsoil and place to one side.
Remove 30cm of subsoil and place to one side.
Loosen the bottom of the trench with a garden fork.
Layer 5-8cm organic material, then 15cm subsoil, water well, repeat layers.
Mix topsoil with 1 bag of compost and a handful of bone meal, place back in trench.
Cover with a mulch and apply EM to start things off
* The organic material can be manure or use the trench for composting (takes about 6 months). There are three main methods of starting a vegetable garden which don’t involve digging, they do however require about 6 months.
Method 1: In-situ compost heap - where you have a large amount of weeds This method relies on the work of micro-organisms to breakdown the weeds and earthworms to work the compost into the soil. What you are left with are raised mulched beds full of nutrients.
Stack slashed down weeds; you can leave the roots in the soil as they will be composted.
Cover with hay to keep tidy and deprive any existing weeds of light.
Apply a compost activator (EM will do the trick) to get things started and treat as a compost heap.
Method 2: Sheet mulching - where you have fewer weeds This works on the same principle as the in-situ compost heap.
Stack slashed down weeds; you can leave the roots in the soil as they will be composted.
Place a sheet of cardboard, newspaper (6 layers), old carpets or even old clothes over the weeds.
Add a layer of mulching (+-/ 10cm) on top which will hold down the first layer whilst allowing water and air to pass through.
Make holes through the mulching to plant your first crop. Make sure that the mulching doesn’t get too wet as this could lead to rotting. Check every now and again under the 1st layer for pests. e.g. slugs
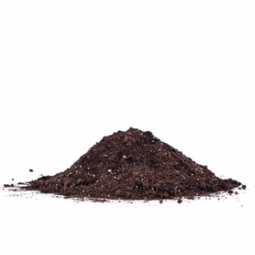
Method 3: Chicken tractor - where you have fewer weeds The chickens are placed into an enclosure over the area. They then scratch out weeds, loosen the soil surface, add manure, eat the weed seeds and pests (cutworms, snails, grasshoppers, etc.) and if you were clever enough to get laying hens you’ll have organic eggs for breakfast too. Once they have cleared the area all you need do is loosen the ground with a fork, work in some compost, a bit of bone meal a dash of EM and you’re ready to plant. After all that reading, here are some images to motivate you to start preparing your soil for spring. If you need any assistance in planning your vegetable garden or an organic garden feel free to contact me. We have a Facebook page - Space to Place Designs or follow the Landscape Design link @http://www.plantzone.co.za/. We'll also be at the Green Market (Moreleta Kloof Nature Reserve, Helios St, Moreleta Park, Pretoria) every 1st Saturday of the month. Useful Links
More about EM (http://emrojapan.com/aboutem.php)
Contact Nico Kotze @ 083 260 6643/ nico@wag-online.co.za should you have any queries or Thomas Linders on 082-457-4586.
More about eco-circles (http://biophile.co.za/gardening/circle-gardens-a-discovery-par-excellence)
More about food gardens (http://www.foodgardensfoundation.org.za/)
Booklets about growing vegetables and herbs from the department of agriculture (http://www.nda.agric.za/publications/publications.asp?category=InfoPaks)
Sources for the article: 1. Cultivating Flavour - Kitchen gardening for kindred spirits by Toni B Walters 2. Organic Garden Basic by Bob Flowerdew 3. Organic Gardening by Geof Hamilton
www.plantingseason.co.za
Did you know that there is a substance in existence right now that can radically improve our soil quality? It even removes much of the pollution from our water systems. It's called EM: "effective micro-organisms". They are a completely natural way of using nature's little helpers to clean our earth and water. (See an astonishing documentary on how they used EM to clean an entire inland sea in Japan here !) My family and I even drink it as a pro-biotic. More about EM to come.
The health of a plant is directly related to the health of the soil it grows in. Unfortunately, the state of our soils is so bad that more chemical fertilizer, more pesticides and more food processing is required every year to keep our food resembling food. As Thomas Linders says,"people talk about this global crisis and that global crisis. What about the soil crisis???"
For those new to organic gardening, preparing your soil can be complicated and time consuming. If you want a "quick fix" just go out and buy good soil. It's cheap and your results will be great, especially if you are planning to grow in a pot. I know this because that's precisely what I did. So, I won't be offended if you don't pay much attention in today's lesson. However, for those that are serious about the critical science of soil preparation, then let me welcome Elsie Roulston!
Elsie, what’s so special about soil? It’s just there to anchor the plants, right?Well, yes and no. If you’re farming with chemicals then yes, the soil is merely a medium in which to grow the plants, you might as well be growing them in polystyrene pellets. All the extra chemicals and fertilizers you spray onto your crops will feed them and keep them healthy. If, on the other hand, you want organically grown plants then it’s a big NO! The success or failure of your crop will depend on the quality of your soil. If we want strong, healthy plants which are resistant to pests and diseases all we need do is look to nature. Since the dawn of time soil has provided plants with all the nutrients and minerals they could possibly want, there was no need for vast amounts of fertilizers and chemicals to keep the plants healthy. If that’s the case, why am I writing this article? Surely, if you plant a few seeds in your garden you’ll be rewarded with a bountiful harvest. Unfortunately this is not the case, many years of meticulous maintenance and careless building practices has robbed our garden soils of nutrients and poisoned them with cement and other toxins.
Ok, enough gloom and doom, how do we get the perfect soil? ...and what is the perfect soil anyway?Quite simply, we undo the harm we have done by replacing the organic matter we have removed. Our goal should be to promote and support a healthy soil. A healthy soil is alive! It is a home for living organisms (soil fungi, algae, bacteria, insects, worms and burrowing animals) who convert organic matter into a more usable form for plants. Make a home for these organisms and you’ll be rewarded with the perfect soil. The perfect soil has a rich, earthy smell, is dark brown in colour, rich in organic matter, a crumbly texture and is full of earthworms, which are far more useful in your soil than bait at the end of a fishing line.
What must I do to improve my soil?Step 1: Get to know your soil There are many types of soil all with their own pros and cons but the backyard farmer doesn’t need to worry about the technicalities too much. For most of the problems there’s one solution – COMPOST. Adding compost to a clay soil will improve its drainage whilst adding it to a sandy soil will improve its water holding capacity. It’s not an instant fix, but diligently adding organic matter to the soil every now and again will give the existing organisms in the soil a chance to do their part in raising your soil’s fertility. If you’re really impatient and want it corrected instantly, I suggest you take a soil sample to a soil lab (contact your local Department of Agriculture) and ask that they suggest organic fertilizers to improve your soil’s fertility. They will then recommend the exact amounts and types of fertilizers you would need. You should also invest in a soil PH testing kit (available at most nurseries). Why? The PH of a soil determines the availability of nutrients in the soil. Most vegetables require a PH of 6.5 but again, don’t stress too much about it. By constantly adding organic matter (neutral PH of 7) to your soil you will be able to raise the PH of your soil slowly to the ideal range. If your soil is far below or above this range then you should take a sample to a soil lab for testing. Blindly adding lime to your soil to correct the PH, could be disastrous, too much ‘locks up’ nutrients and scorches roots. Never add lime to manure as nitrogen (promotes healthy foliage) is then released from the soil. Only apply lime several weeks before planting. Step 2: Support nature The goal of organic gardening is to mimic nature. If we get this right we will be able to sit back and enjoy a well deserved sundowner on the patio whilst our garden tends to itself. For a successful vegetable garden we should avoid the following:
Badly drained, waterlogged soils - Our plants need to breath! If you have a high water table or very poor drainage then the best solution is to build raised planting beds.
Bare soil - It’s a waste of resources.
Digging
- Digging damages the soil’s structure, even more so when digging wet soil.
- Limit digging to the initial preparation and then once every 5-10 years.
- Rather use a hoe for removing weeds.
Over application of fertilizers - Use organic fertilizers only when it is necessary, the organic matter which you add should have more than enough nutrients and minerals.
Walking over beds - Ever seen a footpath cutting across the lawn? It compacts the soil which you have worked so hard at aerating. Use pathways between planting beds. The beds should not be wider than an arm’s length (60cm), so that they are easy to maintain.
Introducing unwanted weeds and chemicals into our garden – if you are going to buy soil, well rotted compost and well rotted manure for your garden, get it from a reputable company. Don’t be tempted to buy cheap products from just anyone. Rather spend a little extra and not have to worry about spending the next few months getting rid of a new crop of weeds.
Apply the following practices to improve the condition of your soil:
Crop Rotation
- Maintains mineral balance of soil
- Reduces build up of diseases
- Best use of organic matter i.e. allows soil to replenish itself, less input from you
Use mulches (grass cuttings, herbs cuttings, straw, nut shells, compost, old carpets, etc)
- Suppresses weeds by excluding light
- Conserves water
- Helps maintain a stable soil temperature which promotes growth
- Adds fertility to the soil
- Improves soil texture
- Protects the soil from erosion
[Mulch is a protective layer of organic matter that is placed on the top of the soil.]
Encourage existing micro-organisms and earthworms
- Micro-organisms and earthworms breakdown organic matter releasing nutrients
- Earthworms loosen and aerate the soil, vermi-compost/ worm castings promote root growth whilst vermi-liquid/ worm wee is full of nutrients
- Dig as little as possible. Digging breaks up the soil’s natural layers and air pockets (network of earthworm tunnels and decaying roots) which assist drainage.
- Keep the soil moist and apply mulches (feeds the earthworms)
- If you feel your soil could do with a boost, then use EM (Effective micro-organisms)
EM has many applications and can be used as a compost activator as well as a soil conditioner. It restores balance by reducing harmful bacteria and encouraging the growth of beneficial bacteria.
Feed your soil!
- Use well rotted manure, compost (preferably from your own compost heap) and don’t forget mulching.
- Use organic fertilizers such as dried blood, fish and bone meal, seaweed liquid and meal, rock potash, wood ash, liquid animal manures, worm castings and ‘worm wee’.
- Grow green manure crops. It is a quick growing annual plant which is grown as a temporary groundcover and then dug into the top 15-20cm of soil as a fertilizer. Planted in an area of the garden which is not being used, they convert otherwise wasted sunlight and resources into useful organic matter. Sow as soon as soil is bare and until the first frost, cut down before flowering or going to seed and cover with a thick mulch or dig into top layer of soil. Plant annuals rather than perennials as they are easier to control. e.g. mustard, alfalfa, fenugreek, legumes (leave roots in the soil), borage and comfrey (acts as a compost activator). They remove scarce minerals from the soil and make them more available to your crops and helps to prevent erosion and leaching of nutrients.
Right, now that we’ve got a good idea of how to maintain a healthy soil, let’s get that veggie garden started!
Step 1: Don’t forget to plan
Check for Services. Make certain that you aren’t going to dig up sewerage pipes, electrical cables, irrigation pipes or the long forgotten septic tank.
Find that perfect spot for your garden. It should be close enough to the house to quickly nip out to pick a fresh tomato or see if your seeds have come up, be close to a water source and have about 6 hours of sunlight.
Decide on the size and style of the vegetable garden. Start small and in no time you’ll have more than enough vegetables for yourself and to show off to your friends. A plot the size of an average door (2m x 2m) is perfect for a family of four. Do you want a traditional kitchen garden, a pottage, a mixed border in your garden, a water-wise eco-circle (1m diameter) or an economical Peace Garden (1x2m)?
Step 2: To dig or not to dig? The digging or trenching method This method is useful if you have rocky soil, a shallow layer of topsoil or if you want to start planting right away. It is an instant way to increase the depth of your topsoil. It breaks up the subsoil and adds organic matter thereby increasing the depth of the root zone. Roots are encouraged to grow downwards (draw nutrients at a greater depth) and one can plant closer together (bio-intensive gardening). This is the method used for Eco-circles and Peace Gardens.
Mark out the area (1m x 60cm).
Remove all plant material (a good time to start a compost heap), stone and debris.
Remove the top 30cm of topsoil and place to one side.
Remove 30cm of subsoil and place to one side.
Loosen the bottom of the trench with a garden fork.
Layer 5-8cm organic material, then 15cm subsoil, water well, repeat layers.
Mix topsoil with 1 bag of compost and a handful of bone meal, place back in trench.
Cover with a mulch and apply EM to start things off
* The organic material can be manure or use the trench for composting (takes about 6 months). There are three main methods of starting a vegetable garden which don’t involve digging, they do however require about 6 months.
Method 1: In-situ compost heap - where you have a large amount of weeds This method relies on the work of micro-organisms to breakdown the weeds and earthworms to work the compost into the soil. What you are left with are raised mulched beds full of nutrients.
Stack slashed down weeds; you can leave the roots in the soil as they will be composted.
Cover with hay to keep tidy and deprive any existing weeds of light.
Apply a compost activator (EM will do the trick) to get things started and treat as a compost heap.
Method 2: Sheet mulching - where you have fewer weeds This works on the same principle as the in-situ compost heap.
Stack slashed down weeds; you can leave the roots in the soil as they will be composted.
Place a sheet of cardboard, newspaper (6 layers), old carpets or even old clothes over the weeds.
Add a layer of mulching (+-/ 10cm) on top which will hold down the first layer whilst allowing water and air to pass through.
Make holes through the mulching to plant your first crop. Make sure that the mulching doesn’t get too wet as this could lead to rotting. Check every now and again under the 1st layer for pests. e.g. slugs
Method 3: Chicken tractor - where you have fewer weeds The chickens are placed into an enclosure over the area. They then scratch out weeds, loosen the soil surface, add manure, eat the weed seeds and pests (cutworms, snails, grasshoppers, etc.) and if you were clever enough to get laying hens you’ll have organic eggs for breakfast too. Once they have cleared the area all you need do is loosen the ground with a fork, work in some compost, a bit of bone meal a dash of EM and you’re ready to plant. After all that reading, here are some images to motivate you to start preparing your soil for spring. If you need any assistance in planning your vegetable garden or an organic garden feel free to contact me. We have a Facebook page - Space to Place Designs or follow the Landscape Design link @http://www.plantzone.co.za/. We'll also be at the Green Market (Moreleta Kloof Nature Reserve, Helios St, Moreleta Park, Pretoria) every 1st Saturday of the month. Useful Links
More about EM (http://emrojapan.com/aboutem.php)
Contact Nico Kotze @ 083 260 6643/ nico@wag-online.co.za should you have any queries or Thomas Linders on 082-457-4586.
More about eco-circles (http://biophile.co.za/gardening/circle-gardens-a-discovery-par-excellence)
More about food gardens (http://www.foodgardensfoundation.org.za/)
Booklets about growing vegetables and herbs from the department of agriculture (http://www.nda.agric.za/publications/publications.asp?category=InfoPaks)
Sources for the article: 1. Cultivating Flavour - Kitchen gardening for kindred spirits by Toni B Walters 2. Organic Garden Basic by Bob Flowerdew 3. Organic Gardening by Geof Hamilton
www.plantingseason.co.za